Interserver Login guide: Interserver is a leading web hosting provider providing its services for about 21 years. With customers ranging from individual freelancers to developers, Interserver login provides services both domestically and internationally.
They have been offering data services at affordable prices, while still maintaining a high level of service and support. It has industry-leading reliability of service and also partners with Cloud Flare.
They also provide services, such as virtual hosting, cloud VPS, quick servers, dedicated servers, and colocation. It provides a price-lock guarantee and a free migration service.
That being said, one needs to understand its services and process of steps to be able to fully enjoy their Interserver experience.
While is it quite confusing finding the correct steps to help you in the beginner phase, we provide you with a detailed process to get started effortlessly and clearly.
| Sitename | Interserver |
| Service | Hosting and Domain |
| Provider | Interserver International Ltd |
| Hosting | Shared, WordPress, Cloud, and VPS Hosting |
| Available | Worldwide |
| Official website | Interserver.net |
How to Login Interserver?
First, you need to know how to log in to your Interserver account. To log in to your Interserver.net, follow the following given steps.
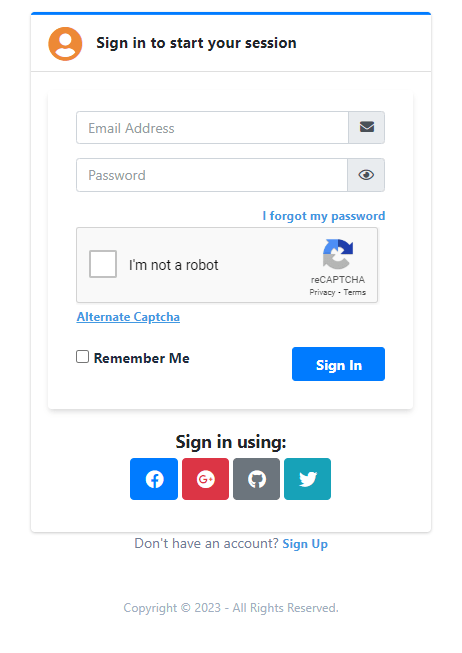
You are now logged into your Interserver account. If in case you forget your password, there is a Forget Password option used to reset your password that will help you to log into your Interserver account.
How do I Access the cPanel with InterServer?
A cPanel is an amazing tool for accessing websites but accessing it is difficult. There any many reasons why it is problematic to log in.
There is two way to access cPanel. One is for the general customers while the other is for customers that use Shared Hosting.
👉 For general customers:
You will successfully log into your cpanel interface and enjoy your time on Interserver web hosting.
👉 For shared hosting customers:
If you are logging in to a shared hosting account, you can simply log in directly from the steps below.
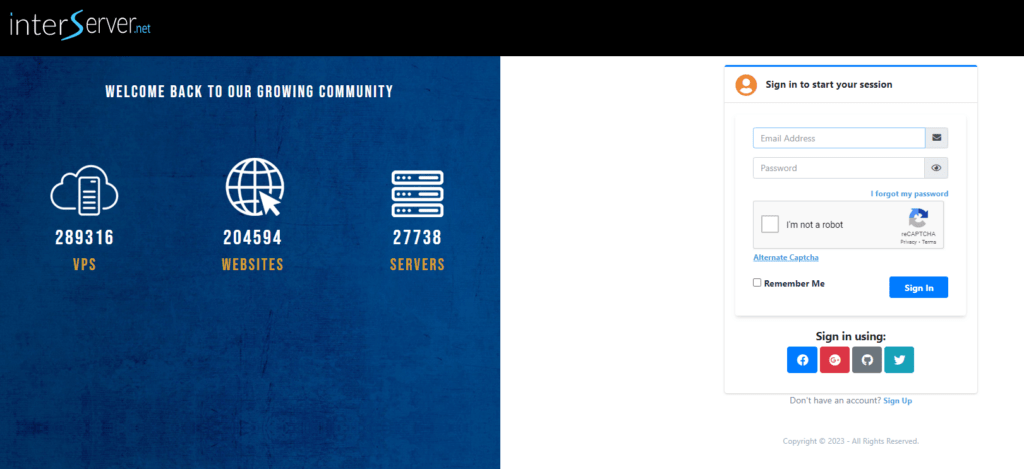
This method does not require any login actions like inputting your email and password. It will simply let you log into your cPanel.
How to Login Interserver Webmail?
Refer to the stepwise instructions below to acknowledge yourself with how to login your webmail in Interserver:
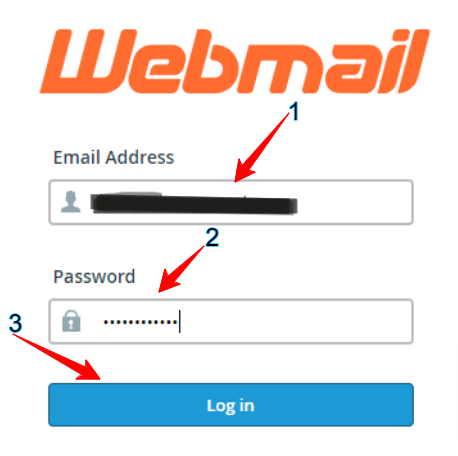
On following the above given steps, you can successfully login to your interserver Webmail account. From there, you can easily compose and send emails, configure your mailbox and perform other email related tasks.
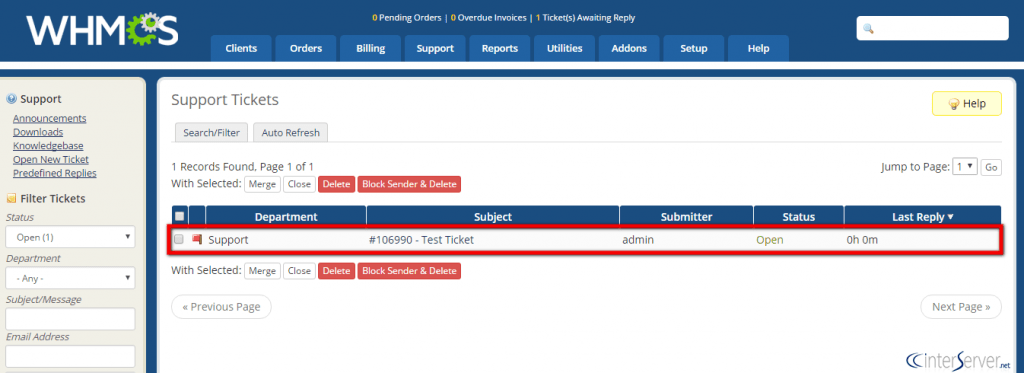
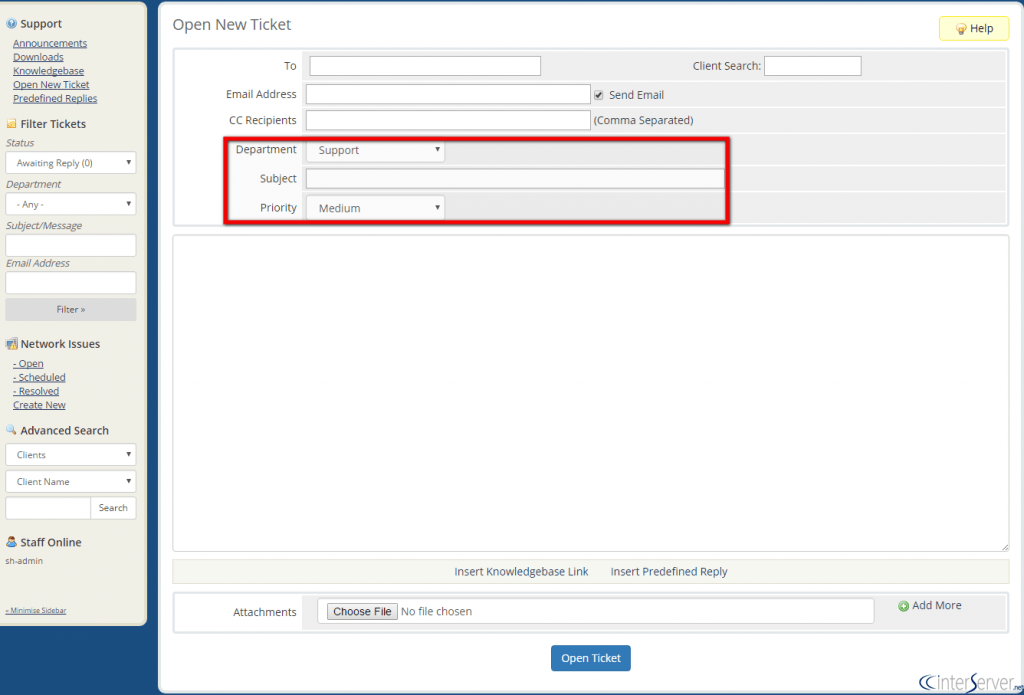
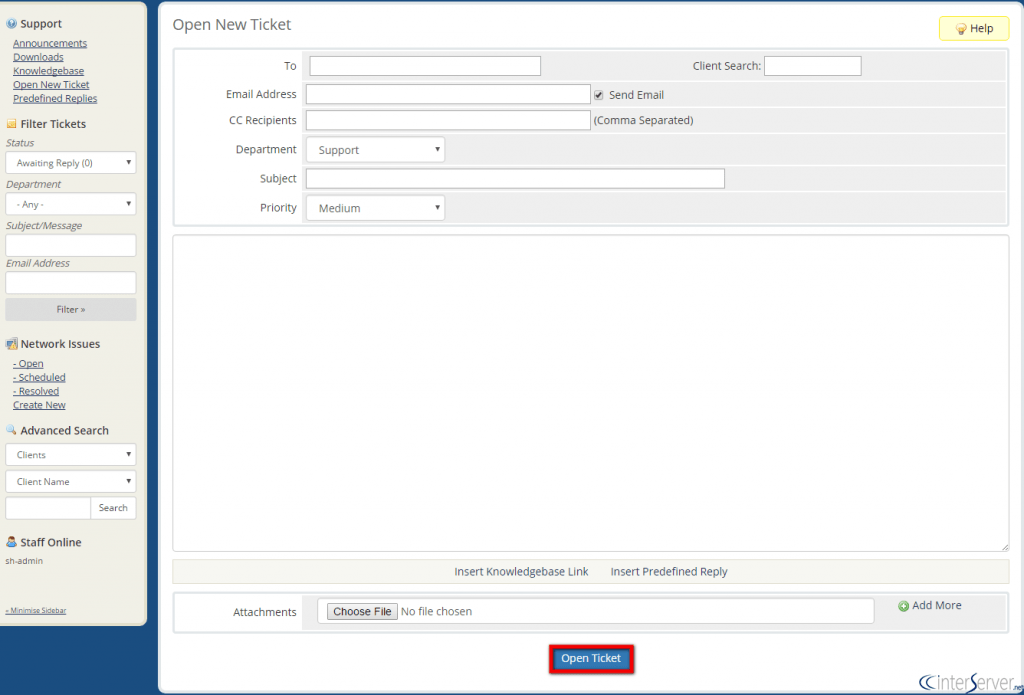
How to Open a Ticket on Interserver?
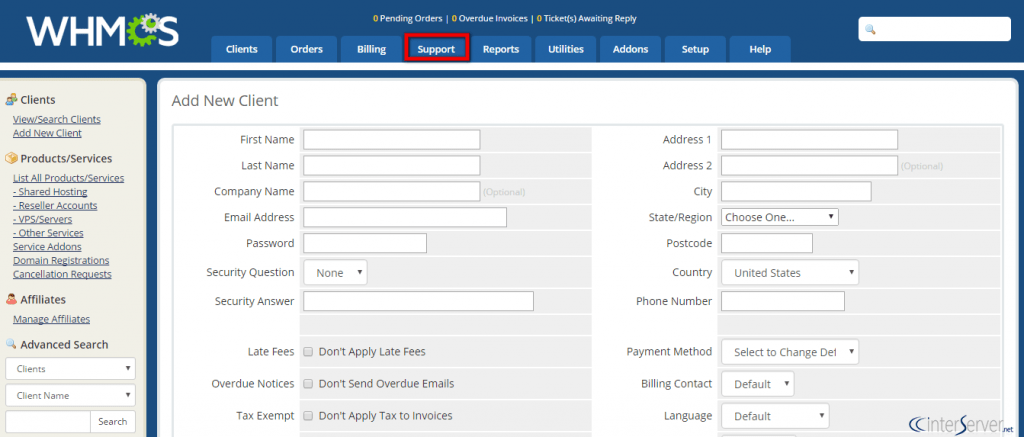
To be able to open your ticket on Interserver, follow the given steps.

What is the NameServer of Interserver?
Nameservers login is a fundamental part of the Domain Name System. It is a server on the internet specialized in handling queries regarding the location of a domain name’s various services.
Hence, the tool returns the status of your name server and the IP address to which it is registered. With these steps, you can find the Interserver nameserver.
Related Post
| Order Hosting from InterServer | https://googiehost.com/blog/hostingloginguide/order-hosting-from-interserver/ |
| InterServer Nameserver | https://googiehost.com/blog/hostingloginguide/interserver-nameservers/ |
| InterServer Support | https://googiehost.com/blog/hostingloginguide/interserver-support/ |
| Interserver Review | https://googiehost.com/blog/interserver-review |


